How To Remove Garden Hose from Spigot
How To Remove Garden Hose From Spigot
How To Remove Garden Hose From Spigot: A Quick Guide
Many of us have experienced it: You're in the middle of a project and realize you can't move forward until you remove that garden hose from the spigot, but don't know where to start. It can be intimidating to take something apart, especially when it's attached to a water line. Fear not! In this quick guide, we will walk you through the steps of safely and easily removing a garden hose from your outside spigot.
Identifying the Parts
The first step in any successful removal is to identify all the parts involved. In this case, the parts are simple, but it's still important to be sure you know what you are working with: The spigot, a nut connector, a hose washer, and finally, the garden hose itself.
Spigot
The spigot is the threaded brass fixture that protrudes from your outside wall. Its sole purpose is to secure a hose and control the water flow.
Nut Connector
The nut connector is two-piece fitting. The back of the connector threads onto the spigot, the front is what grabs the hose washer.
Hose Washer
The hose washer is the rubber or plastic disk that compresses around the opening of the garden hose. It functions as a guide so the hose won't come loose from the nut connector.
Garden Hose
The garden hose is the flexible plastic tube connected to the spigot. It transports the water from your home's main waterline to wherever you need it to go.
Removing the Parts
Now that you have an idea of what you are working with, you can start removing the parts.
Step 1: Shut Off Your Water Supply
It goes without saying, but shut off your water supply prior to removing the hose from the spigot. Turning off the main line in your home is the best bet, some commonly have a shut off lever right next to the outside spigot.
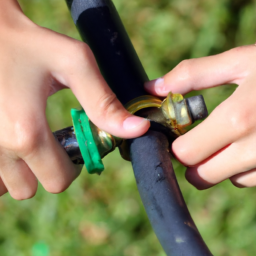
Step 2: Unscrew the Nut Connector
Next, remove the nut connector. Put a pair of pliers or a wrench to the back end of the connector and unscrew it counterclockwise. Once that's removed you can take off the hose washer.
Step 3: Remove the Hose
Pull the hose free from the spigot. It should come free fairly easily, but if not, try a few gentle tugs. If it still won't come off, try twisting the hose while you pull. Now your hose and spigot should be free from each other.
Cleaning & Reattaching
Since you now have the hose off, it's always a good idea to give everything a thorough cleaning. Remove any dirt, rust, or debris from the spigot. The threads are especially important, as this is what secures the hose.
Reattaching the Hose
When you're ready to put the hose back, start by connecting the nut connector to the spigot. Thread it on by hand as far as you can, and then use a pair of pliers or a wrench to secure it the rest of the way.
Adding the Hose Washer
Thread the hose washer onto the end of the nut connector and make sure it's securely in place. This does two things: It creates a more secure connection and it provides a watertight seal, preventing leaks.
Attaching the Garden Hose
Finally, attach the garden hose to the connector. Push the end of the hose onto the washer and pull it tight to make sure there are no gaps. When the hose is securely in place, turn the water back on and check for any leaks.
Brief Recap
Removing and reattaching a garden hose from a spigot is a lot less complicated than it seems. Just remember to identify the parts, turn off the water, unscrew the nut connector, remove the hose washer, and pull the hose free. Finally, clean the parts, attach the hose washer, and reattach the garden hose. All in all, if you take your time and have the right tools on hand, it shouldn't take more than 10-15 minutes.
Previous Page